|
 |
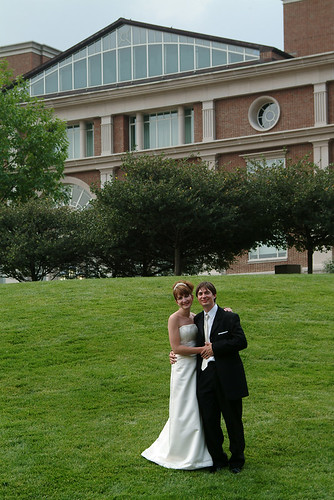
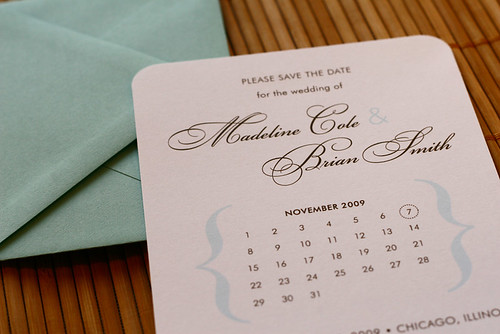
Since my last post shared a moment from my own wedding, it might be a good time to give details from the event. After getting engaged, I got sucked in to planning beyond belief. I scoured the internet for inspiration, read every magazine possible and jammed a huge binder full of ideas. I pretty much turned into a typical bride! As a girl who didn't want a big dress or a bouquet toss, I encountered challenges along the way as I searched for unique elements that would personalize our event. In the end, our budget forced us to turn into a DIY couple–creating everything from monogram banners that flanked the entrance to our ceremony to hand-embossed napkins perfect for signature cocktails at our reception. It was a lot of work, but well worth every minute of the effort we put into it. Outside of the tangible details we created, we also personalized our wedding by doing a few key things just a little differently. Before walking down the aisle hand-in-hand, we each took a stroll through the garden where our ceremony was held with our parents by our sides. And, instead of riding off in a rented limo afterwards, we took a gondola ride right outside of our reception location. It was a goosebumpy moment for us–one that we enjoyed away from a crowded cocktail hour as we let our new commitment to each other soak in. Click the following thumbnails to enlarge. More "real couples" will follow in the future. Until then, happy Thanksgiving!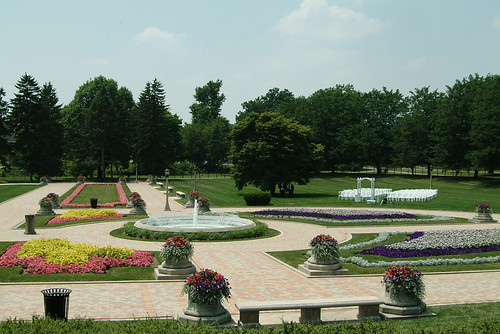 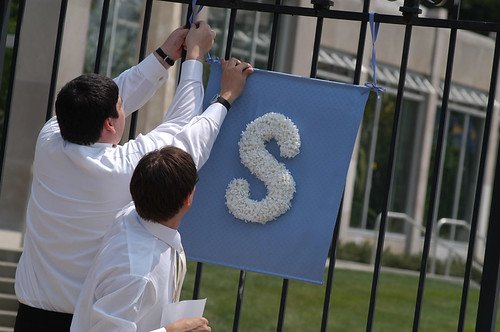 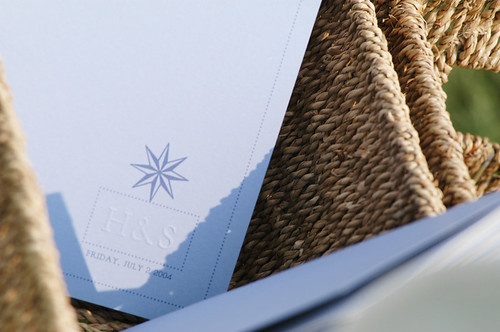 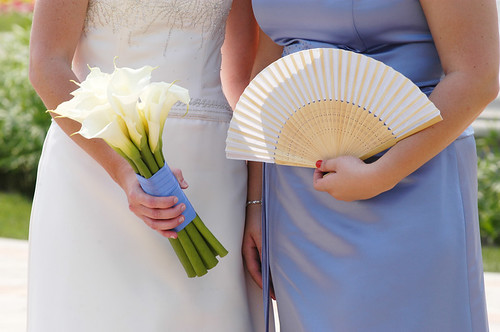 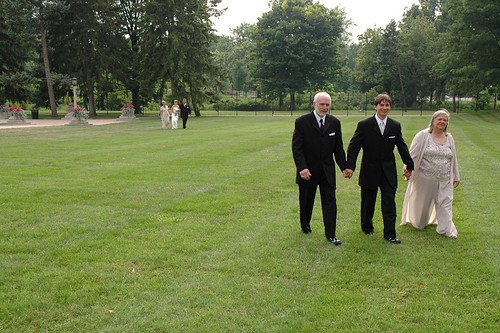  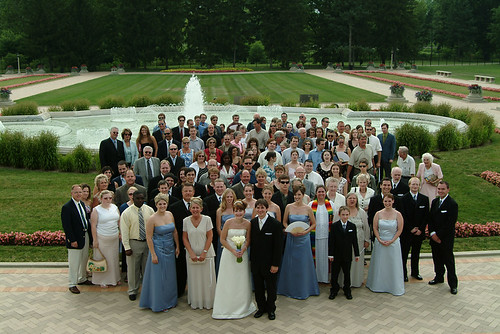 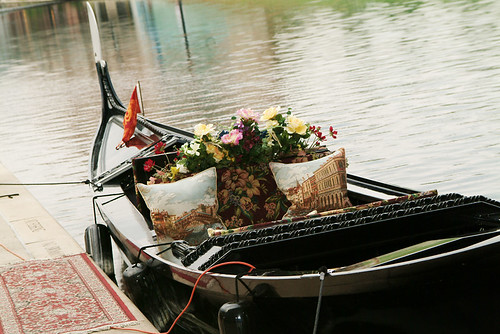 
The best weddings are the ones that truly reflect a couple's happiness. I can't tell you how many ceremonies I've witnessed where the couple was hardly mentioned. Don't let that happen to you! Guests leave with warm hearts when they've been let in just a little more than normal.
If you have a story that is too cute not to share with your guests, share it. Incorporate special moments from your dating history into a toast, or create a photo album or scrapbook that sits on display with your guestbook or escort cards.
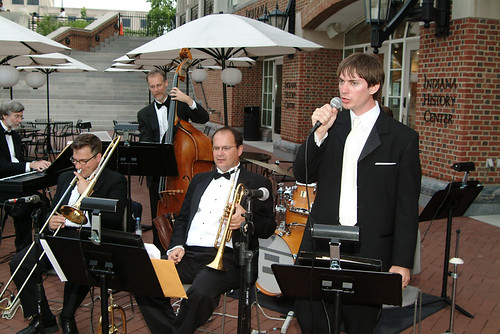
If you have a talent or hobby that you are passionate about, incorporate it. My musician husband arranged to serenade me with the big band at our reception. I was surprised and touched by this gesture. Many of our guests hadn't ventured out to his late night gigs, so they were also excited to see him perform. The photos that resulted keep us reminded of that special moment in our big day.
So, when planning your ceremony or reception, think about what makes you... you. Whether that be something that reflects you as an individual or as a couple, work it in. Your guests will be left with something to talk about.
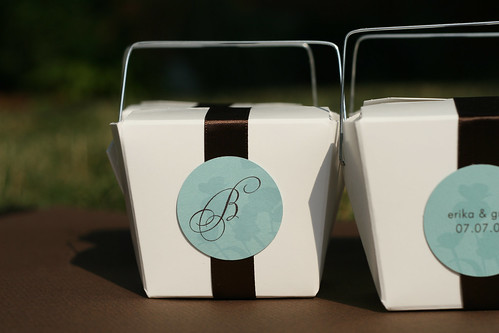
It's easy to create favor packaging that is modern and classic. By combining an inexpensive satin ribbon with a tag that has been printed at home, you can dress up takeaway boxes or other containers without eating up your budget.
Using the first in our series of free wedding templates, you can create your own tags by following these steps:
STEP 1
To get started, download the monogram labels (shown above) in chocolate brown or black. Once you have downloaded the template, print your specific monogram's page at 100% of the original size on the cardstock of your choosing. Colored cardstock that coordinates with your wedding colors looks especially great.
STEP 2
Once you have printed enough pages to cover the number of favors you plan to produce, use a pair of scissors to cut the sheets into horizontal strips. Be careful not to cut into the faint circle outlines you see printed on each page, cutting in between each row wherever you please.
STEP 3
Using a 1 1/2" circle punch (available at most craft stores and online retailers such as Impress), punch each circle to produce the finished tag. If you are using a traditional punch, turn it upside down to line it up with the faint outline that has been printed on each sheet. Following this method, punch out all of the tags.
STEP 4
If you are ready to adhere it to your favor packaging, roll a strip of permanent adhesive on to the back of each tag. We like the Tombow mono adhesive tape roller for projects like this. It's affordable, refillable and extremely sturdy. Like the circle punch, the Tombow roller is available at most craft stores and online retailers such as Scrapbook.com.
 Make the entrance to your ceremony or reception with these elegant monogram banners. After your big day has come and gone, they're wonderful mementos. SUPPLIESAll supplies can be purchased at a local craft. The finished size of these banners is approximately 26" tall by 22" wide with the initials being 14" tall. - Upholstery fabric: Purchase enough fabric to make two 26" x 22" banners. When possible, choose a heavy upholstery fabric in your color palette.
- Stitch-witchery or sewing machine
- Dowel rods: 4 in 1/4" widthCut dowel rods to approximately 30" long.
- Styrofoam: 22 sheets of floral styrofoam, approximately 1" thick.
- Floral buds: Purchase bunches of inexpensive, seasonal flowers.
- Ribbon: Choose a sturdy satin ribbon.
- 2 Snaps per banner: You can use other alternatives, such as Velcro. These are not required if you wish to create a triangular hanger.
- Hot glue gun
- Invisible fishing line thread
DIRECTIONS - After cutting the fabric to size, use stitch-witchery or a sewing machine to hem the edges. Create a pocket at the top and bottom of each banner by folding the fabric over and placing the hem low enough for the dowel to fit into. Be sure to leave openings on either side so the dowel can slide in easily.
- Using software such as Microsoft Word, print initials at desired size. The sample used letters that were approximately 14" tall. To print at this size, use the "tile" setting on your printer to create a large stencil. Doing so will print the initial onto several pages that can then be cut out and taped together.
- Trace around the initials' edges onto styrofoam. Cut with a utility blade.
Tip: If the styrofoam breaks, it's not a problem. You can hot glue it back together. For added support, use wooden skewers to support any breaks that might occur. - If you purchased flower buds in bunches, you will want to cut off individual buds. Using these individual buds, cover the letters completely using hot glue and by pushing the stems into the styrofoam.
- To attach the letters to the banners, use a combination of hot glue and clear fishing line to attach/sew the letters to the material.
- Attach ribbon to dowel rods. Sew snaps to the appropriate place on the ribbon to create a hanging loop. Creating a triangular hanger is much easier and only involves looping one large piece over each end of the dowel.
Although trendy for several years now, paper lanterns are a classic and affordable way to decorate a large space--whether you're having an indoor or outdoor event. To dress them up, add a simple batch of white string lights, choose varying sizes for contrast, or add a pretty satin ribbon tail in your color palette. Visit Asian Ideas for a great selection of white and colored lanterns.
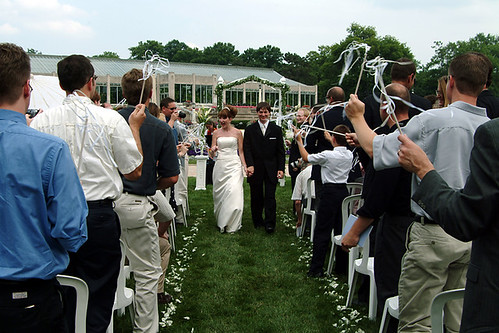
This is the beginning of a series of posts on different ways to do things at your wedding. From walking down the aisle to exiting your reception, the ideas presented here will range from traditional and classic to modern and unique. My goal for these posts is to help you think outside of the box by introducing a little something that will give your big day a more personal feel.
So, let's start with a different way to exit the ceremony. Bells and bird seed are good options, but the visual element created by ribbon wands makes for exciting wedding photos! Add a little note to your ceremony program to cue your guests when it's time to stand up and wave. SUPPLIES
All supplies can be purchased at a local craft and hardware store. This supply list makes 32-40 ribbon wands. - Ribbon: 100 yards
Purchase approximately 100 yards of thin inexpensive ribbon. Choose a color combination, or one solid color, that suits your needs. Additionally, if you want your ribbon wands to be fuller than those shown in the sample image, just add more ribbon.
- Dowel rods: 32-40 in 1/4" width
Craft stores sell dowel rods at pre-cut lengths in bags of 8-10. The 12" length makes for an ideal ribbon wand. While you can also purchase dowel rods at a hardware store, you will most likely have to cut them to your desired length.
- Paint
Purchase one small bottle of craft paint in the color of your choice. The ribbon wands shown in the sample image were covered with a metallic pearl coating. For a simpler option, you can also leave them unfinished.
- Sponge brush
- Sandpaper: Fine grade
- Screw eyes: 40 in 214 x 13/16 size
These can be difficult to screw into the head of each dowel, so use pliers after getting it started. Also, be gentle, as the wood can split.
DIRECTIONS - Using the sponge brush, paint all dowels. Stand them on end in holes punched in a piece of styrofoam to dry.
- After the wands have dried completely, gently sand them with fine grade sandpaper. Painting may roughen the surface, so sanding them will remove rough areas without removing the paint.
- Attach a screw eye to one end.
- Cut the ribbon into 15-20" lengths. Cut ribbon at an angle to avoid any fraying that might occur.
- Gather a total of 5-6 ribbons and slip through the screw eye. Tie in a nice, tight knot.
You can now find us on Flickr! If you'd like to take a closer look at any of our products, the Maida Vale photostream is located at www.flickr.com/maida-vale. And, you can always find a link to the photostream at the top of the right sidebar on this blog.
Have you noticed the list of links that appear in the right column of this blog? Whether you are a new bride or mom-to-be, these are a few of our favorite places for inspiration and ideas. We will add to this listing from time to time, so please comment if you have any others you'd like to share!
I have hosted a holiday party in one form or another for the past 15 years. Some years, they have been large gatherings with mistletoe-induced shenanigans. Other years, they have been smaller, more intimate get-togethers. Regardless of size, it just isn't the holiday season without a party or two on our social calendar. Each year, I take pride in creating the invitation that will welcome friends and family into our home each December. This year's creation was inspired by a recent trip to a French bakery in Northern California. For a little extra something, I created envelope liners from paper by Snow & Graham. Now I just have to be patient and wait until after Thanksgiving to start decorating! Click to enlarge the following images.   
Our Etsy shop is officially open! At maidavale.etsy.com, samples of our invitations and announcements are for sale. If you purchase a sample and place a subsequent order, you will receive a credit for the cost of the sample. Other goodies will also be added in the coming months. Stay tuned for details. And, until Monday, have a great weekend! 
I'm often asked where the name "Maida Vale" derives from. In addition to having a passion for all things paper, I'm also passionate about travel in Europe. After initial visits in the early 90s sucked me in, I decided to spend a summer in London studying British politics and the history of the city. Choosing London was a safe decision given that a language barrier wouldn't exist, but doing so was certainly one of the best choices I've made. I landed in a small apartment (shared with six other students no less!) in a lovely residential neighborhood called Maida Vale. Live music, amazing museums and galleries, and even Abbey Road were either within walking distance or a short ride on the underground. In a nearby area called Little Venice, there is a picturesque canal reminiscent of my former Indianapolis neighborhood of Broad Ripple. Essentially, staying in London (and Maida Vale) coincided with an important time in my life—a time of new found independence, confidence and enthusiasm for travel and design. I have returned many, many times and will always think of it as my second home. And, hey, it also doesn't hurt that vale is pronounced veil! 
Welcome! The goal of this blog is to provide inspiration and ideas galore for your wedding, as well as other yummy design tidbits. But first, let me introduce myself: I am Heather, creative director and owner of Maida Vale (established in 2006). I currently reside in Seattle with my husband (Shawn) and two kit-kats. In an upcoming post, I'll share details from my own 2004 nuptials. Stay tuned!
|
|
|
|
|
|
|
|